tiistai 15. joulukuuta 2020
New blogging home
Instead of fixing this blog, I decided to start from beginning.
I'll be adding the old posts from this blog to the new one. And I'll probably be linking the blog posts I make there over here. At least for now.
sunnuntai 6. joulukuuta 2020

torstai 18. lokakuuta 2018
The state of this blog
Photo hosting for most of the photos in this blog ended, so it's looking pretty empty right now. I don't know when I get around fixing those. It's also eating my motivation to update.
In the meantime, while I work on that, I've turned to Instagram for posting my sewing progress.
https://www.instagram.com/before_the_automobile/
I also have a Facebook page that I update semiregularly.
https://www.facebook.com/beforetheautomobile/
In the meantime, while I work on that, I've turned to Instagram for posting my sewing progress.
https://www.instagram.com/before_the_automobile/
I also have a Facebook page that I update semiregularly.
https://www.facebook.com/beforetheautomobile/
keskiviikko 27. syyskuuta 2017
Mid 18th century riding habit
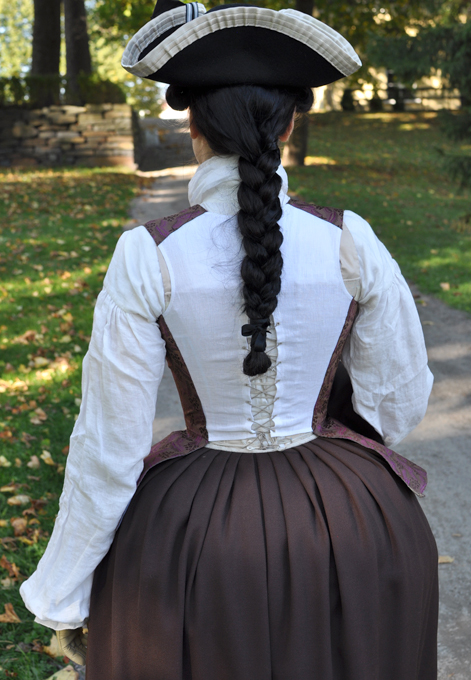
This is my take on the famous 1730-1750 riding habit jacket in Janet Arnold's Patterns of Fashion 1 and the equally famous riding habit jacket in V&A museum. It's in three pieces; a wool petticoat, a wool jacket with silk and linen linings and a silk waistcoat with a plain linen back. It's hand sewn with silk and linen treads. Underneath I'm wearing stays, a riding habit shirt, a small hip pad (shaped to emphasise hips more than the back) and linen petticoats. The jacket is trimmed with wide silver ribbon and narrow silver gimp trim added on top on both sides.


Insides / construction photos:
I backstitched the jacket outer layer together.
Then I turned the seam allowances on one side and, using a spaced backstitch, stitched another line close to the seam. This topstitching seems to have been a common feature in 18th century riding habits. You can see it in the high resolution photos in the V&A jacket as well.
Here's how it looks on the outside.
I stiffened the jacket fronts with linen canvas pieces. Those, with additional help from the trim, keep the jacket fronts straight and well in shape.
Jacket lining and silk front facings.
I used an 18th century reproduction silk for the waistcoat. I had very little of it so I had to piece it in few places. I think I like it more with these small details.
I joined the jacket and waistcoat skirt linings with the top layer with running stitch, smaller stitch showing on top.
I top stitched the bust darts too on both, the jacket and the waistcoat.
Waistcoat has lacing down the back.
sunnuntai 9. huhtikuuta 2017
Hand painted robe à la Française, late 1750's to early 1770's
Late last year I had the honor of receiving an invitation to a 1757 reenactment in March 2017 in Zeilitzheim. I knew I wanted a new saque for the occasion as I had worn my cream gown so many times already. I also knew I didn't want another solid color gown. Appropriate silk brocade is difficult to find. And if you do, it always costs a fortune. While looking for inspiration, this gown gave me the idea to paint some silk to make a colourful gown while staying on budget.


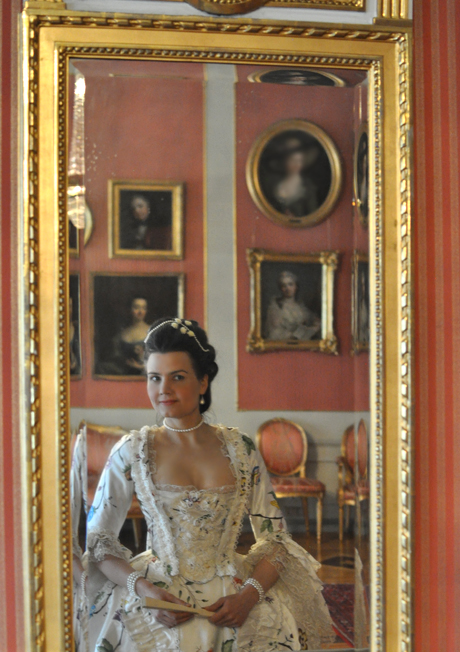


The gown is made of duchess silk satin painted with Deka silk paints. It has a linen lining and the self fabric trim is edged with looped passementerie trim. It's completely hand sewn with linen and silk thread.
It's worn over shift, stays, pocket hoops and two linen petticoats. For the photos I styled it to fit early 1770's style.
I wasn't able to finish the gown before I left to Germany but I managed to make the stomacher and few other finishing touches while I was there and was able to wear it as planned on Saturday evening. There was only a very small mirror on our room, and the first time I was wearing the gown I hadn't even seen it on myself. That was a strange feeling. But, despite pinning it on a little hastily leaving some wrinkles, it turned out ok.
We wanted to concentrate on enjoying the experience rather than on taking photos, but I have these two as proof. I think the fabric and colors worked well in candlelight.
Construction:
The gown was draped over a fitted lining with the help of my husband. I started by draping the back, then back skirts, bodice fronts, front skirts and then sleeves.
I left sleeve heads unneatened under robings.
Painting:
I made six different floral stencils that I rotated as the work progressed. I outlined everything first and then painted the colors.

The flowers are based on three different painted 18th century gowns but my main inspiration was the gown in V&A museum.
This is a close up of the V&A gown:
And these are some of my versions
I noticed one particularly ugly flower in there so I had to have it in my dress too.
Tilaa:
Blogitekstit (Atom)